安信可ESP-12K学习心得 ① ESP32S2 与 ESP32 开发方式对比,带你入门环境搭建;

一 、前言
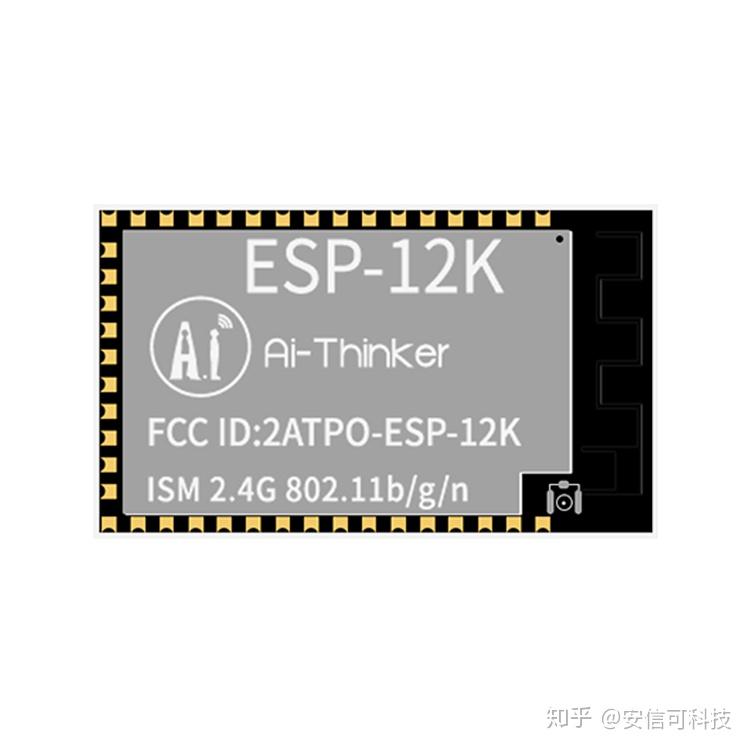
安信可ESP-12K模块采用的是乐鑫 ESP32-S2 芯片,"阉割版ESP32"虽然去掉了蓝牙,但依然比 ESP8266 性能比更高,有43个可编程 GPIO,其特性如下:
- 基于 RSA-3072 算法的安全启动;
- 基于 AES-XTS-256 算法的 Flash 加密;
- 保护私钥和设备机密不受软件访问;
- 密码加速器提高云连接性能;
- 有效抵抗物理故障注入攻击;
- ESP-12K 集成了丰富的外围设备,有 43 个可编程 GPIO,可以灵活配置为 USB OTG、LCD 接口、摄像头接口、SPI、I2S、UART、ADC、DAC 等常用功能;
- ESP-12K 具有 LCD 接口和 14 个可配置的电容触摸 GPIO,可为基于触摸屏和触摸板的设备提供良好的 HMI 解决方案。
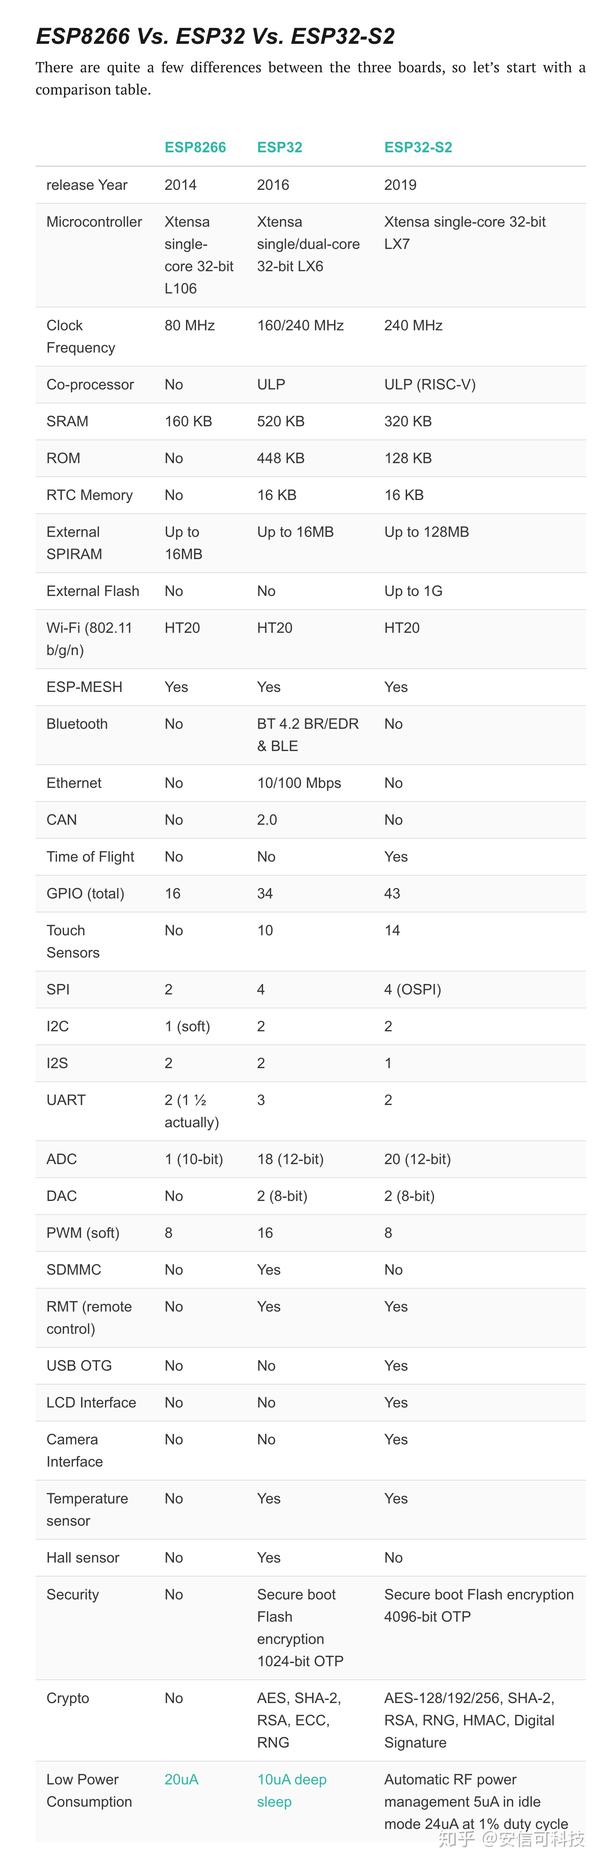
ESP8266 / ESP32 和 ESP32S2的差别一览表

1.1 ESP32S2 对比与 ESP32 开发方式
由于ESP32S2 为 ESP32 的阉割版,去掉了蓝牙的单核版,所以此芯片是没有蓝牙协议栈的,但是与 ESP32 的二次开发类似;
目前我们推荐使用的是 Linux 环境开发,下面推荐使用 window 自带的 Linux 子系统环境搭建,当然了,你也可以用虚拟机实现!
因此,根据下面文档,搭建最新的 ** ESP32** 即可支持 ESP32S2 啦!

二 、安装 Ubuntu 18.04
Bash on Ubuntu on Windows 是通过 Windows Subsystem for Linux(WSL)这一 Windows 10 的最新特性实现的,使用此功能,你可以在 Windows 中原生运行 Linux 的大多数命令行程序。
启用 WSL 功能之后,如果使用 Bash,则 Windows 10 操作系统会下载一个由 Canonical 创建的 Ubuntu用户模式镜像Ubuntu user-mode image,然后 Bash 程序以及其他的 Linux 二进制程序就可以运行于该 Ubuntu 镜像上。此外,微软也承诺未来会提供更多 Linux 发行版以供选择。
Bash on Ubuntu on Windows 功能主要是面向于开发者,我们可以在 Windows 中使用一些 Linux 生态链的开发工具。
由于这个面向的是开发者,所以安装的window系统务必是专业版,你可以去某宝自行购买一个激活码。
准备材料:
window 专业版,不能是家庭版 ;
window 应用商店:Microsoft store;
安装步骤:
1、启用“适用于Linux的Windows子系统(WSL)”
通过Win10任务栏中的Cortana搜索框搜索打开“启用或关闭Windows功能”,向下滚动列表,即可看到“适用于Linux的Windows子系统”项。
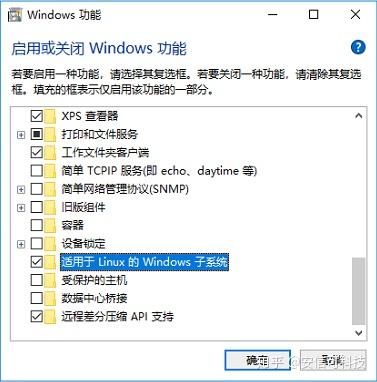
勾选它,确定,然后按提示操作重启系统:


2、启用开发人员模式
然后进入“设置 - 更新和安全 - 针对开发人员”设置页面,选中“开发人员模式”。如图:


3、下载并安装 Ubuntu(可通过微软商店获取)
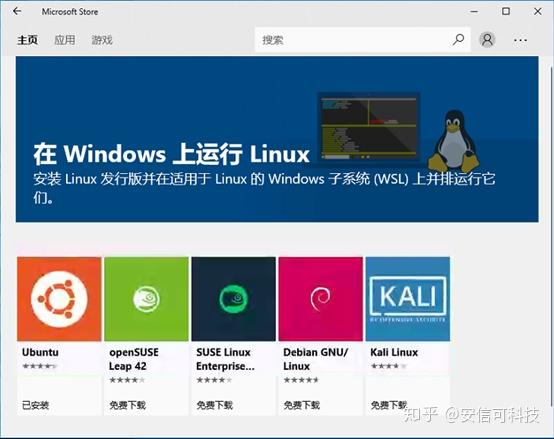
微软后来把Ubuntu、openSUSE、SLES和Fedora分发上架到了Microsoft Store(微软商店),你可以很方便地下载安装这些Linux发行版。如图:

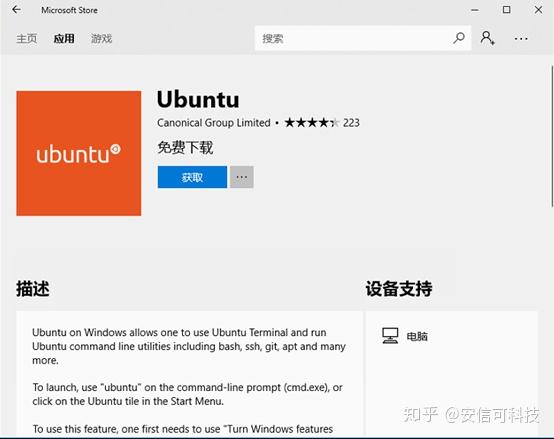
以下载安装Ubuntu分发为例,点击 Ubuntu 打开详情页面,然后点击获取。如图:

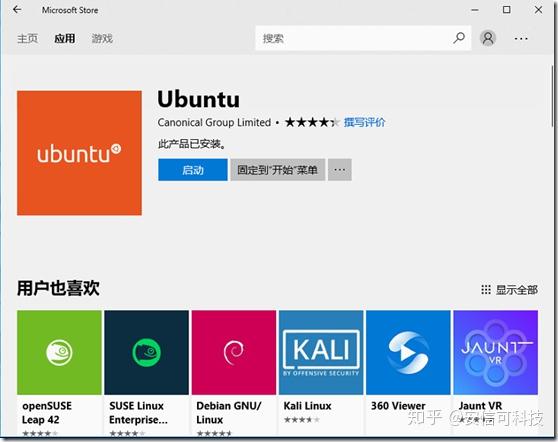
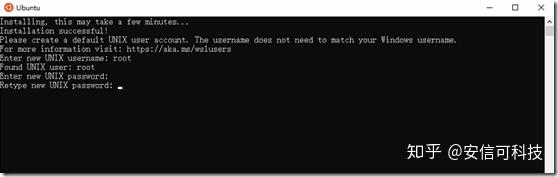
4、点击启动

首次安装,会提示您输入账号和密码,务必记住!

之后,在任意地方按住shift + 鼠标右击弹出的 --> “在此处打开 linux shell” ,即可连接到了 Linux;


三 、安装 ESP-IDF 环境
3.1 安装常见的软件
我们需要安装几个常用的软件 :
sudo apt-get install vim sudo apt install git
3.2 开始一堆依赖安装:
sudo apt-get install git wget flex bison gperf python python-pip python-setuptools python-serial python-click python-cryptography python-future python-pyparsing python-pyelftools cmake ninja-build ccache libffi-dev libssl-dev- 乐鑫IDF框架是什么?这里我就不多说了! 用
git命令来拉取下来,这就可以可以同步最新的框架版本!不能直接一个downLoad下载,发现会有错误,切记!
3.2.1 【方式一】用博主提供的方式拉取最新代码
众所周知,乐鑫的开放源码都放在GitHub,而GitHub又被微软收购了,这一年的访问下载速度慢得乌龟一样,哈哈!所以,我克隆一份放在了国内的码云网站,这样就保证我们拉取代码非常快!
PS:这份同步乐鑫源仓库的工作,我们会一直保持下去!
首先,我们先拉取源码,先不拉取子模块!
git clone https://gitee.com/xuhongv/esp-idf.git没有拉取子模块的是不完整的代码,看了下子模块源路径是不规范的,这里,我们再修改为码云上的:
- 记事本打开
.gitmodules,全部替换为下面这个内容! - 然后再更新子模块 , 你会发现快的一匹 :
git submodule update --init --recursive
[submodule "components/esptool_py/esptool"]
	path = components/esptool_py/esptool
 	url = https://gitee.com/xuhongv/esptool.git
[submodule "components/bt/controller/lib"]
 	path = components/bt/controller/lib
 	url = https://gitee.com/xuhongv/esp32-bt-lib.git
[submodule "components/bootloader/subproject/components/micro-ecc/micro-ecc"]
 	path = components/bootloader/subproject/components/micro-ecc/micro-ecc
 	url =  https://gitee.com/xuhongv/micro-ecc.git
[submodule "components/coap/libcoap"]
 	path = components/coap/libcoap
 	url =  https://gitee.com/xuhongv/libcoap.git
[submodule "components/nghttp/nghttp2"]
	path = components/nghttp/nghttp2
	url =  https://gitee.com/xuhongv/nghttp2.git
[submodule "components/libsodium/libsodium"]
 	path = components/libsodium/libsodium
 	url =  https://gitee.com/xuhongv/libsodium.git
[submodule "components/spiffs/spiffs"]
 	path = components/spiffs/spiffs
	url =  https://gitee.com/xuhongv/spiffs.git
[submodule "components/json/cJSON"]
 	path = components/json/cJSON
 	url =  https://gitee.com/xuhongv/cJSON.git
[submodule "components/mbedtls/mbedtls"]
	path = components/mbedtls/mbedtls
	url =  https://gitee.com/xuhongv/mbedtls.git
[submodule "components/asio/asio"]
 	path = components/asio/asio
	url =  https://gitee.com/xuhongv/asio.git
[submodule "components/expat/expat"]
 	path = components/expat/expat
 	url =  https://gitee.com/xuhongv/libexpat.git
[submodule "components/lwip/lwip"]
	path = components/lwip/lwip
	url =  https://gitee.com/xuhongv/esp-lwip.git
[submodule "components/mqtt/esp-mqtt"]
 	path = components/mqtt/esp-mqtt
	url =  https://gitee.com/xuhongv/esp-mqtt.git
[submodule "components/protobuf-c/protobuf-c"]
 	path = components/protobuf-c/protobuf-c
	url =  https://gitee.com/xuhongv/protobuf-c.git
[submodule "components/unity/unity"]
 	path = components/unity/unity
 	url =  https://gitee.com/xuhongv/Unity.git
[submodule "examples/build_system/cmake/import_lib/main/lib/tinyxml2"]
 	path = examples/build_system/cmake/import_lib/main/lib/tinyxml2
	url =  https://gitee.com/xuhongv/tinyxml2.git
[submodule "components/bt/host/nimble/nimble"]
 	path = components/bt/host/nimble/nimble
	url =  https://gitee.com/xuhongv/esp-nimble.git
[submodule "components/cbor/tinycbor"]
 	path = components/cbor/tinycbor
	url = https://gitee.com/xuhongv/tinycbor.git
[submodule "components/esp_wifi/lib"]
 	path = components/esp_wifi/lib
 	url =  https://gitee.com/xuhongv/esp32-wifi-lib.git
[submodule "components/tinyusb/tinyusb"]
 	path = components/tinyusb/tinyusb
	url = https://gitee.com/xuhongv/tinyusb.git
[submodule "examples/peripherals/secure_element/atecc608_ecdsa/components/esp-cryptoauthlib"]
 	path = examples/peripherals/secure_element/atecc608_ecdsa/components/esp-cryptoauthlib
 	url = https://gitee.com/xuhongv/esp-cryptoauthlib.git
3.2.2 【方式二】用官方方式拉取最新代码
带子模块递归方式拉取GitHub,慢慢等吧!
git clone https://gitee.com/xuhongv/esp-idf.git3.3 设置 IDF_PATH 路径
这里就简单很多,就设置变量即可!先拿到上述的SDK路径即为IDF路径!
以我的环境为例:
export IDF_PATH=/home/xuhongv/ESPRESSIF/ESP32/esp-idf- 之后按下 i 表示嵌入代码:
vim ~/.bashrc - 任意一处添加 表示嵌入上面代码!
- 按下esc 再 :wq 表示写入保存:
source ~/.bashrc - IDF_PATH 路径测试是否设置成功:
echo $IDF_PATH


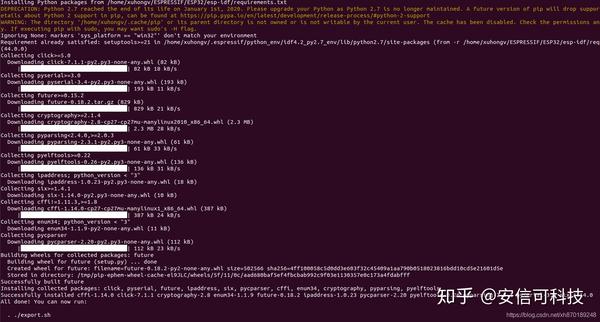
3.4 安装其他工具
除了 ESP-IDF 本身,您还需要安装 ESP-IDF 使用的各种工具,比如编译器、调试器、Python 包等!
cd/home/xuhongv/ESPRESSIF/ESP32/esp-idf ./install.sh出现这个 , 表示 安装成功!

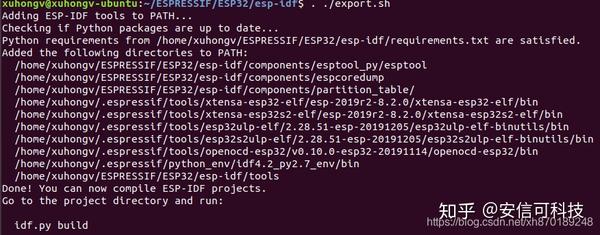
3.5 设置编译环境的变量
此时,您刚刚安装的工具尚未添加至 PATH 环境变量,无法通过“命令窗口”使用这些工具。因此,必须设置一些环境变量,这可以通过 ESP-IDF 提供的另一个脚本完成。
注意下面命令2个小数点中间有一个空格!
. ./export.sh成功后,便这样提示:

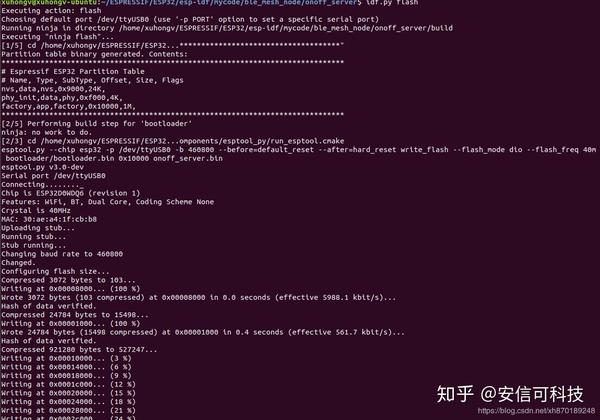
3.6、开始编译工程。
打开 IDF/esp-idf/examples/get-started下面的hello_world工程;
idf.py set-target esp32s2 menuconfig: 配置编译芯片为esp32s2,并配置面板;idf.py build: 编译代码;idf.py flash: 烧录程序进去设备里面;idf.py erase_flash: 擦除设备里面的程序;

四 、常见问题
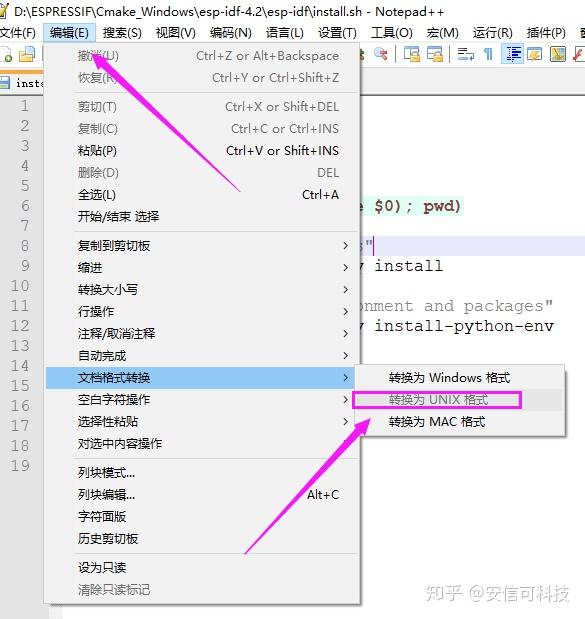
Q1:运行install.sh运行报错$'\r': command not found?
- 使用 Notepad++ 编辑保存为
UNIX格式,再次运行即可!

Q2:编译报错 No certificate found?- 把
esp-idf\components\mbedtls\esp_crt_bundle\cacrt_all.pem文件按照第一条方法修改为UNIX格式
Q3:在下载或安装依赖时候,有时候会突然卡住?
- 可以试下最小化最大化窗口,以唤醒 shell 窗口;
Q4:如何挂载串口?
- window平台的
COMx对应WSL的/dev/ttySx,例如COM4对应WSL的/dev/ttyS4。但是只能在设备管理器中看到哪些串口可用,无法在Linux查询可用串口;
关注公众号[ 安信可科技 ],查看更多最新产品发布及代码分享!下期内容
【安信可ESP-12K模组学习心得 ② 安信可ESP-12K模组直连苹果智能家居 HomeKit 平台,轻松语音 Siri 控制!】